from Yesterday...
PRETTIFY
first is this: (goes hand in hand with 1 from yesterday) PICNIK.COM
Some reader left me a comment about using it (dear reader...whoever you are... i love you)...and I had never heard of it...but once I was over there..I never left.
A before:


and after
you can add borders

write words

or you can totally play around with it....


and i'm sure it does a bunch of other stuff to that I don't even know about!

anyways...I love it. try it out. Auto fix will become your new best friend!
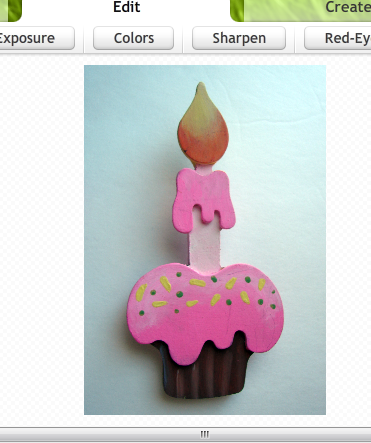
Let me tell you what I do with a general picture.
I load it.

my orginal picture.
I push auto fix
(sometimes I don't like what auto fix does...so you can undo if you don't like it.)

after auto fix.
then I crop it.
(to get my little finger out of the way)
then I hit exposure to and lighten it up some more....

then I go to create and effects and then I hit booost...and whoa nelly it boosts it.

you just take that little slider back until you have what you like (sometimes I leave it like this..a little funky)
FINISHED product:

a side by side
sounds like a lot of work...but it takes about 2 minutes...and once again..I only do this for the things I sell in my etsy shop and my finished product pictures...
P.S.
(I only use the free one...you can upgrade for cheap..but I have yet to find a reason!)
Now: I am going to show you how to use picnik to make stuff
like this:

(doesn't matter which one..

click on the exposure button on the top of the edit page and make both of the little tabs go to 100....this will turn you picture completely white. (now while you are still on edit..you can pick crop and crop it down to a rectangle or whatever side you want!)

then click create..

(I put a border around mine so you can see it....but you just click text and and start adding words...for different sizes and placement you will need to start a new text box
then you just click the save and share button

and then you can just put it in your blog as a picture (you can add a link with it like i did for my advertising button)

I made one..saved it...and continued editing and just changed the text..so the writing and colors all matched for a coehisve look

for the ouch...it's a sticker...I think it was in speech bubbles. then click text (the circle on top of your little text box lets you turn your image.
for awesome video step by step..check out i am momma hear me roar...she walks you through the basics and shows how to make your pictures look awesome!
GO HERE (you should see the clone one she does~! she does alot more fancy pancy ones than me!!!!!)
also if you have a etsy shop you can go to your etsy and FIND promote on the left hand side and click etsy mini. you can from there adjust your size and then get a code to add it to your blog.

(I was able to take these pictures using my snipping tool that comes with my computer) (which I just found about 2 weeks ago!)
and as I mentioned before....
733 blog has also been doing blog help.....she shows how to do A TON of STUFF! I go over every week and somethings I had figured out (accidently) by myself and some things are things that I have ALWAYS wondered how people were doing it! (click HERE)
you can learn
How to number you comments
and creative comments title
seriously...she covers a ton of basics that make life easier...and then some of the harder things you've always wondered how to do!
she also does blog design if you just want to bite the bullet and pay someone!
You can click here to learn how to make a collage header like this one: (using picnik!!!)

I also found THIS that supposedly walks you through making your own signature....like the one you are about to see...
Another great free program I use for photo editing and organizing is picassa from google. It even has a button where you can access picnic through picassa. Sweet...
ReplyDeleteBummer, your signature doesn't show up. :(
ReplyDeleteUm nevermind, for some reason when it posted my comment your signature popped up. I'm officially a nerd. eh.
ReplyDeleteThis is a great series of posts. Thank you for all the great advice. I use Paintshop Pro for my editing, but I've checked out Picnik and I really like it because it is very easy to navigate through.
ReplyDeleteJust in case you didnt already know this... You are AMAZING!! Thanks for all the great advice!
ReplyDeleteKimbo- These are great tips! Now, I just need to take a weekend and get this done to my blog- any takers on my kids for a couple days? No? Oh, well- I'll just piecemeal it until it all gets done. :) Thanks, Kimbo!
ReplyDeletexoxo,
Amy
love picnic. thanks for all the 'how-to' stuff. this is just awesome!!!
ReplyDeleteyou = AMAZING!! Such great tips- I've already created a new signature and added the Link Within widget... I also posted and linked up to your amazing post!
ReplyDeleteThanks so much!
Katie
www.persnicketypickles.blogspot.com
[2nd grade blog]
That's great! I just changed my profile picture with one I edited. I'll definitely be doing more of that in the future. Thanks again for such great tips!
ReplyDeleteThanks for the advice... I want to make my blog intersting for people to read... I thought it was getting boring! :)
ReplyDeleteThanks so much for mentioning my header tutorial! There are so many great tips here too...looking forward to checking out these links. :)
ReplyDeleteI just found your blog through a friend of mine, took some of your advice and made a light box, yay! You rock, thanks!!
ReplyDeleteThanks for your last two posts they have been so helpful! Love your blog.
ReplyDeleteok since your offering advice... I need help!!!! Ive just started a blog and I cannot figure out how the individual page links work!!?? help!?
ReplyDeleteI am loving Picnik! I've been playing on it all day! Check out my new and improved pictures: http://fastdaze.blogspot.com/2011/02/snow-daze.html
ReplyDeleteKim, thanks so much for this great advice!
ReplyDeleteI had never heard of Picnik, awesome!
I have a question for you:
What do you use to store your pictures - in order to have them in your posts?
I originally uploaded everything through blogger (which uses picasa), and I just apparently ran out of storage space!! I was so surprised, and really bummed. It wanted me to pay for extra storage.
So, now I am very curious what other bloggers use? Obviously, uploading through blogger is convenient - but I would prefer not to pay. Any advice you could give here would be appreciated:)
Thanks!
Lindsay @ Diary of a Crafty Lady
craftyladylindsay.blogspot.com
lindsayronae (at) gmail (dot) com
Thanks for your great tips! When I started blogging last July I posted more of a journal for myself and then someone asked me to link up my sewing project to their party a couple of months ago (I did not know what the heck they meant! what a newbie)!! So to make a long story short thanks for sharing with us. I will check out that blog that does blog designs as I have been thinking of doing it but had no idea where to start!!
ReplyDeleteThanks for sharing about 733's tips. Good stuff. I'm following her now, I added numbers to my comments (wew! does that help for giveaways and random.org), I made a signature, changed my comment link, and I'm joining on her give away for the knock off contest. I've always been a HUGE fan of picnik. I'm a paid user. It's WORTH IT! The touch up features are nice... and you get more fonts and features too. I automatically renew my subscription every year. I'm telling ya- if you get it... you'll be hooked. It's just too much fun to make yourself loose 20 lbs, get a great tan, white teeth, and blemish free skin in less than 5 minutes. ( =
ReplyDeleteThanks again for sharing all the blog help. I look forward to reading your next blog advise post ( =
i just discovered picnic too! I love it!
ReplyDeleteby the way if you hit "prnt scrn" it seems like it does nothing but if you go to paint and you hit paste it will paste a photo of what your screen looked like. :)
Love your blog (as much as I love my gluegun :) )
Thanks for all the advice! It has helped a lot! Thanks for following my blog! You may be the only one ever!! I am still trying to figure it all out...I am a little slow though...
ReplyDeleteThanks for sharing all this stuff. My blog will be a much more attractive place to visit as soon as I do some of this stuff;-}
ReplyDeletethank you so much for taking the time to explain and share where to find information. I am brand new to blogging and I am learning a lot from your post. I am excited to try out your information ... :)
ReplyDeleteThanks for the great tips & resources! :)
ReplyDeletePICNIK is BACK! It is Picmonkey.com. It is AMAZING!
ReplyDelete