actually..if you used picmonkey at all...you might love me.
i've got a few tricks and tips for you ----
first: the new fonts...they've got some...
this channel is my favorite....
i love being able to write on my photos....it takes the work out of scrapbooking!
you can also squeeze it and made it vertical...(sneak peek project of next week)
and i love this layers button. it makes life so easy. I go in and add all these shapes...then when i try to do words i keep accidentally grabbing the shapes and moving them. so i add all the behind shapes...push this button and it makes it part of the picture so you don't keep accidentally moving it. then you are free to do your words or what not!
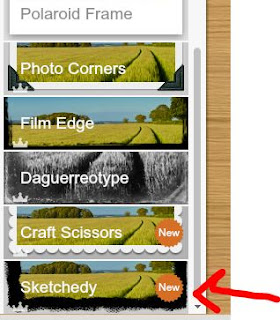
and i love the craft scissors frame. so fun!
now...i've been using pikmonkey to make all sorts of printables for church and blog
(do you remember this quote? it's my fav from HERE)
and i thought i would give you a quick how to in case you are wondering..how to..do it.
i've blogged about this...many times.
but i'll start from the beginning so no one gets lost.
you upload ANY picture.
then you go to exposure and drag them all the way over until your picture is white. (you can do this twice if you still have some dark marks.)
then you crop it to the size you want....(usually a square for a button)
for the quote up above I actually go to layers...
and i upload my own....(i actually go to some fabric shops and get a picture of fabric for the background...
I don't sell my stuff so i feel okay using them...if you do sell stuff you might want to use ones that allow you too!
the texture lets you rotate and fade.....and you crop out any part you don't want..(like the ruler)
then i just added a couple label stickers (faded to not lose the fun pattern)
push the layer button up top and add some words... (when i have specific colors i'm working with (like the orange)..i will right click on the words and duplicate it so everything matches!
i also added this fabric as a sticker....but if you wanted a specific thing on your picture --the sticker has an add your own option so you upload whatever you want!
see..you can add any clipart you want...the only problem is that it stays white around it (unless it's a full picture....so you have to make a way to make it work!
the final one has 3 of the shapes layered onto each other...(you are going to need to right click your mouse and move to front or back a LOT during this process!)
and guess what...next week is BOY CRAP!
so excited. this big black frame is just in the frame section...
AND if you are making buttons...you will want to resize to about 300 or smaller so they can fit in a sidebar!
{and cheri just put in a great video of ipiccy...(go here) it's my very close second to picmonkey}
but naptime creations does such a great job...that you can just go HERE and read about it!


Awesome... So did not know that layer tool was there, going to use the crap out of that!
ReplyDeleteLove the tip of pulling photos off of fabric websites! Pure Genius!
ReplyDeleteI now find myself going to pic monkey before photoshop for things like this! Love it!
ReplyDeleteSeriously, thank you for this. I just started using picmonkey (oh and blogging). I knew it could do more than I was making it do. Thank you for all these tips!!!
ReplyDeleteWow. I didn't realize you could do so much with pic monkey. I'm going to have to play around with it tomorrow.
ReplyDeleteI'm pretty much in love with you right (but not in a creepy way!) now because I have just spent 2 hours trying to do text only on picmonkey and couldn't figure out how !!! Thank you!!!
ReplyDeleteWww.Angela-thesimplethings.blogspot.com
Thanks for sharing. I just discovered picmonkey a month or so ago bu i'm still rusty so your tips are very helpful!
ReplyDeleteJennifer
with your clip art (the one with white all around...) you can use the picmonkey eraser function to actually erase all the white around, so you are just left with the paint brush picture. You can also paint it back if you make mistakes while you are erasing. Its time consuming, but has great results :o)
ReplyDeletedoesn't like work of any kind hey, praise the lord, my kids must be normal! Thanks, I am the worst photo taker/editor
ReplyDeleteI just commented on your Disney printable post about finding a great replacement for Picnik. I have used Picmonkey but not to the extent that you have showcased!! On my birthday list for this year is to make printables for my blog. So, I thank you for this post & look forward to delving in!!
ReplyDeleteCheers,
Heather @ Find That Warm Fuzzy Feeling
I've just mentioned this tutorial in a post of mine.... and added a tutorial about using the eraser function :o)
ReplyDelete