this was a guest post over at postively splendid
and i do think it's quite clever...but i'm vain like that...
and an easy project...
introducing.....
It's a pillow....
it's a blanket..
it's a planket....?
okay. so it's a working title.
(that was supposed to be sung to the pillow pet song)
but whatever it is called...
it's awesome.
and usable.
and a great gift for the traveler...
or the napper...
or the picnicer.
or the football fan...

someone did mention that they have heard it called a quillow (quilt/pillow)
and I loved the excuse to go to joanns and buy some fleece....
i narrowed it down to like 10


I bought a yard and a half of the print..and half a yard of the green
(but realistically you could buy a pre-made blanket and just add the pocket!
(or you could add the pocket in the same print as the blanket so it's not noticeable at all)
trimmed the edges to make it all even and nice..

then i had to break out the math.
i used to be very good at math.
then i had kids.
fried the brain or something.
but it's not too difficult. I drew a picture cause I'm a visual person....

if your blanket is big...and you do only 4...than your pillow is going to be pretty big. (so keep all this in mind. )
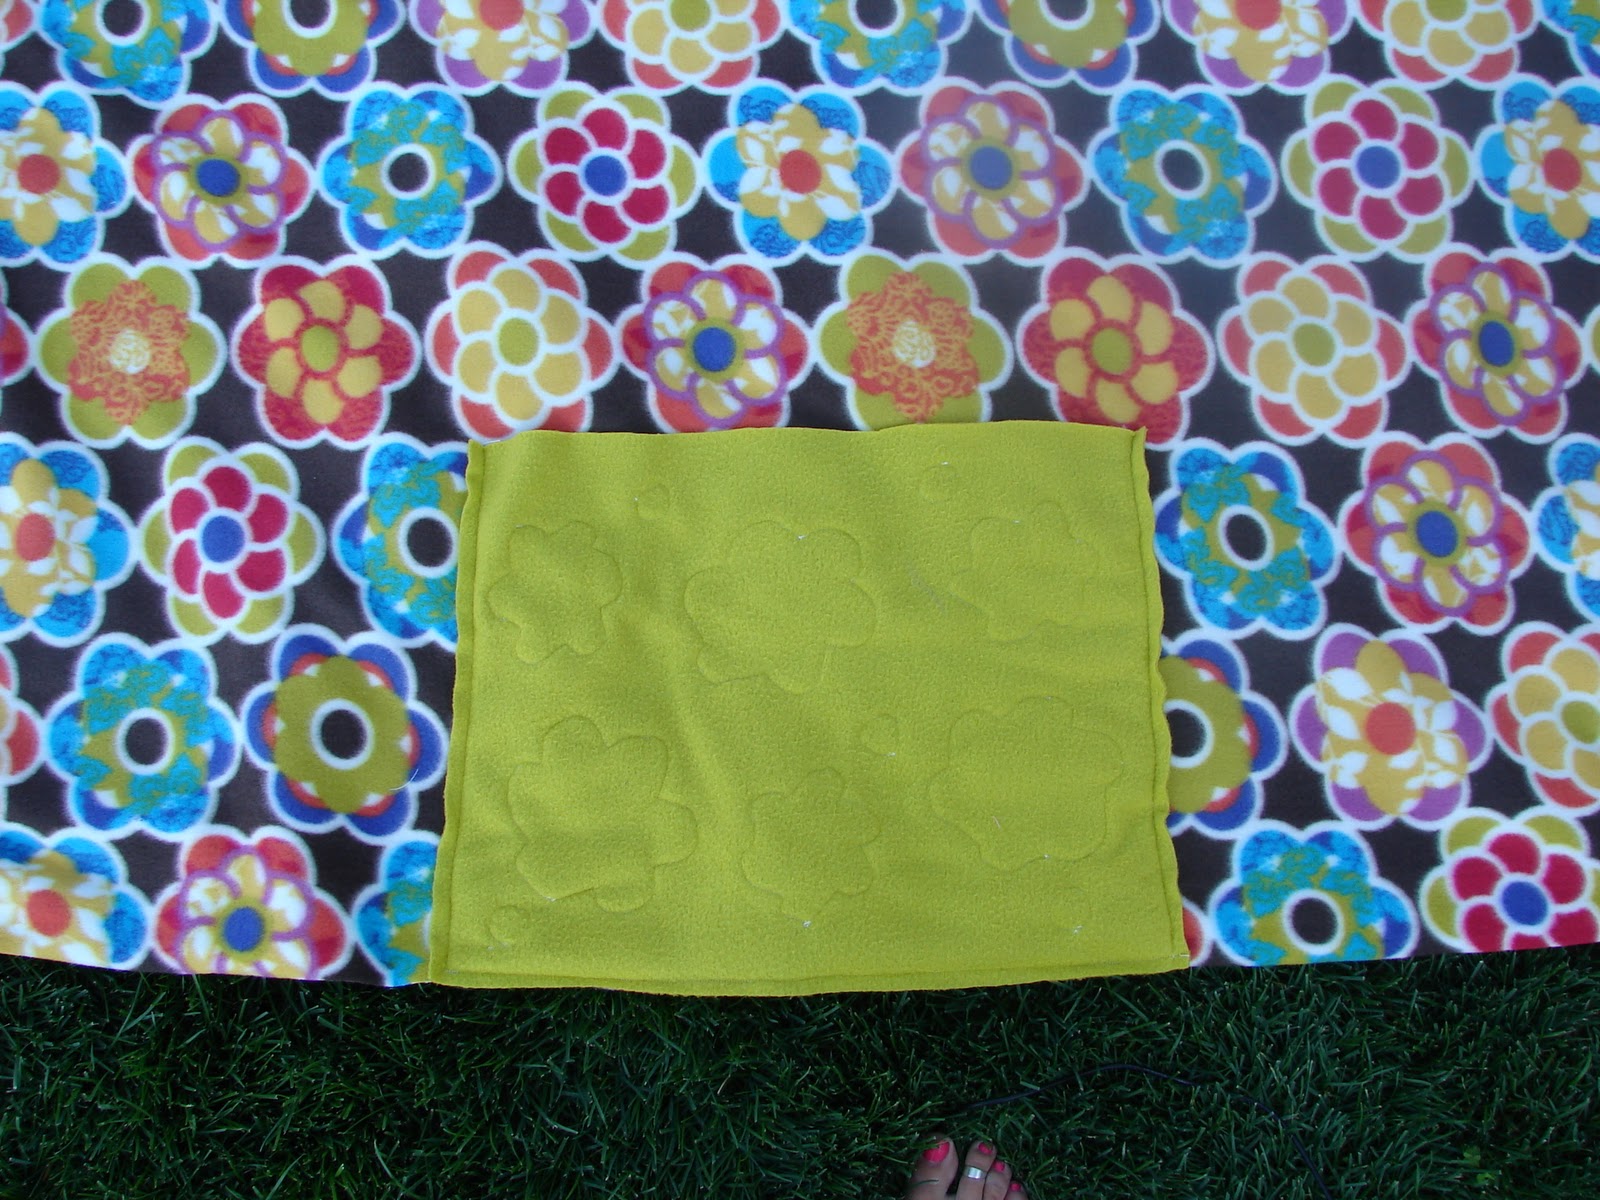
The measurements of my pillow is 14 x 18...so i added an inch for a seam and cut 15x19

and cause i feel the need to add crap to everything..
i decided to sew on some flowers to decorate the pillow.
made a template

cut them out..and sewed them on

Now...if you are only using one piece of fabric than you need to pick something that will be okay from both sides (like you can't do a letter k. cause it will be backwards on the blanket or pillow side)
but you could just add another piece of fabric and then the problem won't be a problem.
I put the flowers face down on the blanket...(so the pillow will have the pop outs)

okay..so just like my drawing...the pillow goes at the top (or bottom) in the middle (centered) (on the back if you have a back to your blanket)

sew it on...except for the part i have written do not pin here. that will be our pocket to stick our blanket in

lucky for me, i'm using fleece. which means i don't have to finish any seams...but if you are using a fabric that frays you will need to finish these edges before sewing it on...
okay.. sew it on!

you could get all fancy and bind it but i like the lazy easy path.


this would be great to take to a ballgame
keep you warm if you need..
or keep your bum from going numb on the hard bleachers

(you could even get all fancy and make it in your team colors!)

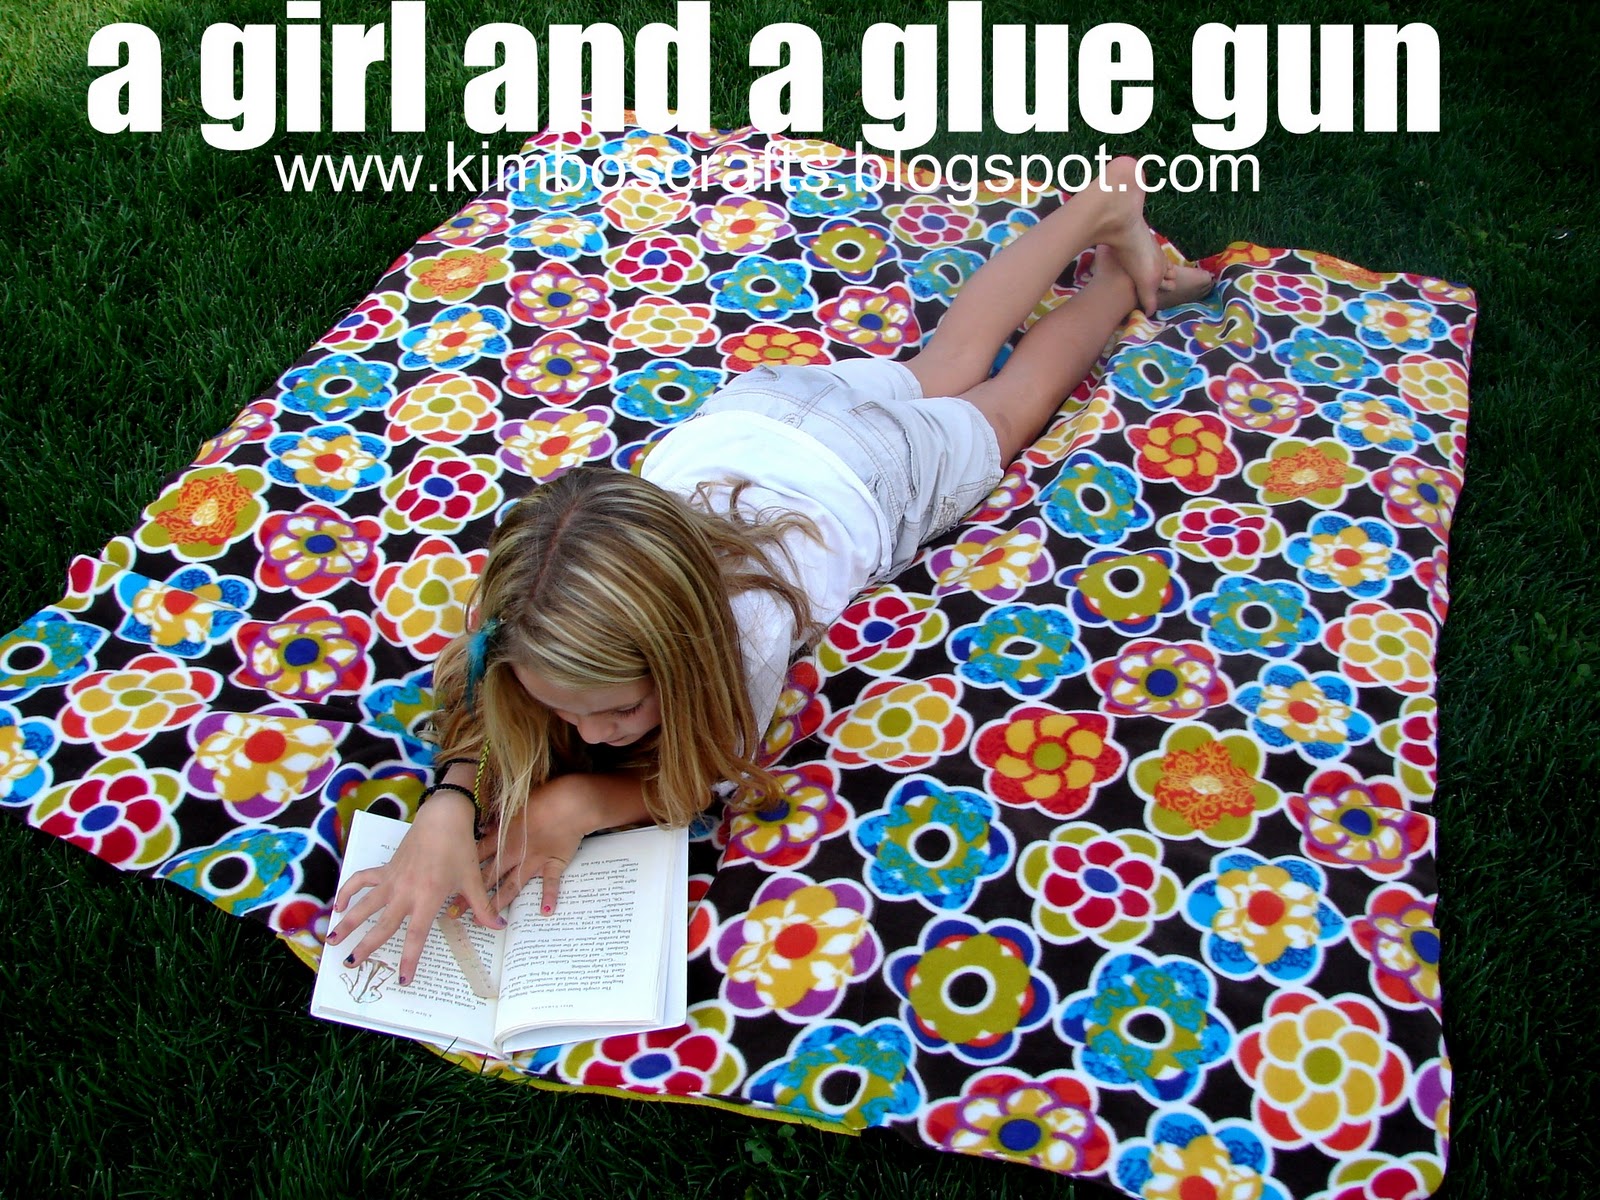

i think i will keep this one in my car. great for picnics,
for long car rides when your kid is falling asleep against the cold window
or for ANYTIME you kid complains cause they are freezing...(even when it's like 75 degrees outside.)


i think i might just add a pocket to all my blankets. makes them so handy to have!

and it's sooooo soft.
edited later to add:
so someone mention handles....
which is just brilliant. brilliant....
i would do fleece..i would just make sure it is doubled up for durability...
and i would put it on at #1...you will have the handle on the inside the pillow and blanket with the ends peeking out. then you could sew it the pillow part as normal..

this will make it so the handle isn't seen while you are using the blanket part.

BUT if you wanted to use it like a bag and put some stuff inside..you would want to sew on the handle where number 2 is...and you would probably need two handles..one on the pillow part (sewn on before you sew on pillow) and another one on the blanket...
same way with the handles tucked underneath the pillow


I made one of these many many years ago forma 4-H project! So fun!
ReplyDeleteI have a blanket similar to this one. Except instead of flannel, it's cotton. I have had it for over 20 years and still use it! (Of course I'm sure it could use some patches etc.) Thank you so much for sharing this tutorial, I'd love to make them for my niece and nephew.
ReplyDeleteDollie
Thanks for sharing that one -you make it look so easy!! I might give this one a go and keep it handy for picnics etc. Thanks so much!
ReplyDeleteI LOVE these! I've made so many just because they're so handy! One thing that I like to do is adding a carrying strap or two straps to make a backpack so that way the kiddos can put some light things in it if they wanted. And it's easier to carry. Great job! :)
ReplyDeleteI made something similar with carrying handles for my niece this Christmas. She uses it for doll's tea parties!
ReplyDeleteFabulous idea! I posted something with fleece today, too! :)
ReplyDeletehttp://crafting-cousins.blogspot.com/2012/01/sleeping-bag-for-baby.html
I got the idea from Make It and Love It.
We called them Quillos. You know, quilt/pillow. ;) I have several that my mom and I made a few years ago! Your fleece version looks super comfy!
ReplyDeleteThis is awesome. I def plan to make at least 2 for softball season. Since my hands are always full, how would you suggest adding a strap??? And what would you use?
ReplyDeletei've edited the post to add basic handle instructions!!!!
ReplyDeletegeniusly done :) I love it!
ReplyDeleteThanks for sharing!!
Hugs,
Nathalie
I made a quillow years ago and gave it to my mom. So I'm really wondering why I haven't made any more - especially out of the fleece like you did!!! Love your fabric choice and the flowers - too cute! Thanks for the reminder of this project - I'm gonna make some for my girlies!
ReplyDeleteActually, putting the handles at 1 and 2 would allow, once the blanket is folded, for you to pull the handled around to the other side, keeping the blanket from peaking out.
ReplyDeleteAnother idea: add a pocket inside the pocket for an actual pillow - a decorative 'flat-style' one - this way, when the PILL-THROW (yea?!) is used for travel, you actually have a pillow part to rest your head on (against the window no-doubt!).
Laura